
I want to start by saying I don't come up with the terminology. Talking about "making sure your art bleeds correctly before printing" sounds a bit scary, but trust me, it's not!
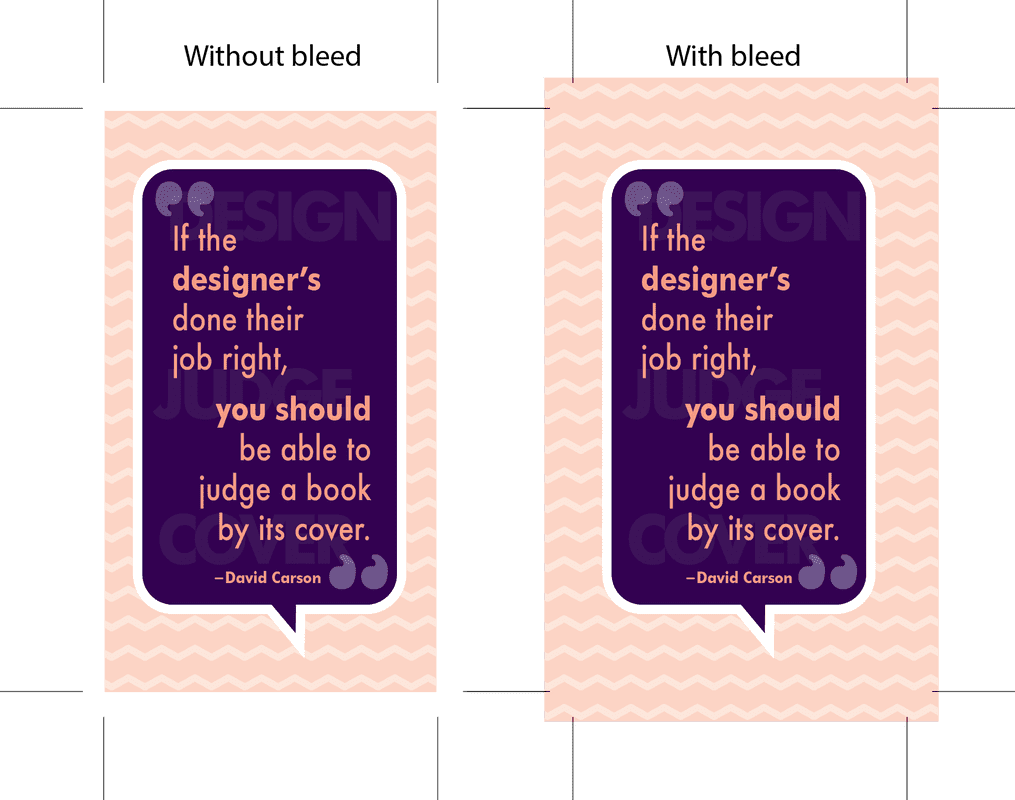
BLEED is the printing term that means that your art runs off the edge of your paper.
What does that mean?
When a design is first created, the designer makes a decision to either have the art end inside a "safe" zone, or continue all the way to the edge. Bleed comes into play when the art continues all the way to the edge. If the image ends even just a hair too soon, a white edge appears at the edge of the page (or card or whatever) and ruins the look of the image. So when the designer creates this masterpiece, she has to extend the art BEYOND where the printer will trim the piece off, eliminating any chance of a white strip showing. This extension is called the bleed.
Here is the difference between an image with bleed and the same without:
There is always a chance that maybe the white won't show, but this is VERY difficult for the printer to deal with. If the cut is off the smallest amount, that dreaded white will show. In a pinch, printers will try to avoid this with little tricks like sending the job to print slightly larger than 100%, or trimming the piece slightly smaller, but both compromise the finished item and can mess up the design. Plus, it takes extra time for them to do this, and they really don't like to have to make that adjustment. It makes everyone happier if the designer sets it to bleed properly BEFORE submitting it to print.
Do you HAVE to use a bleed?
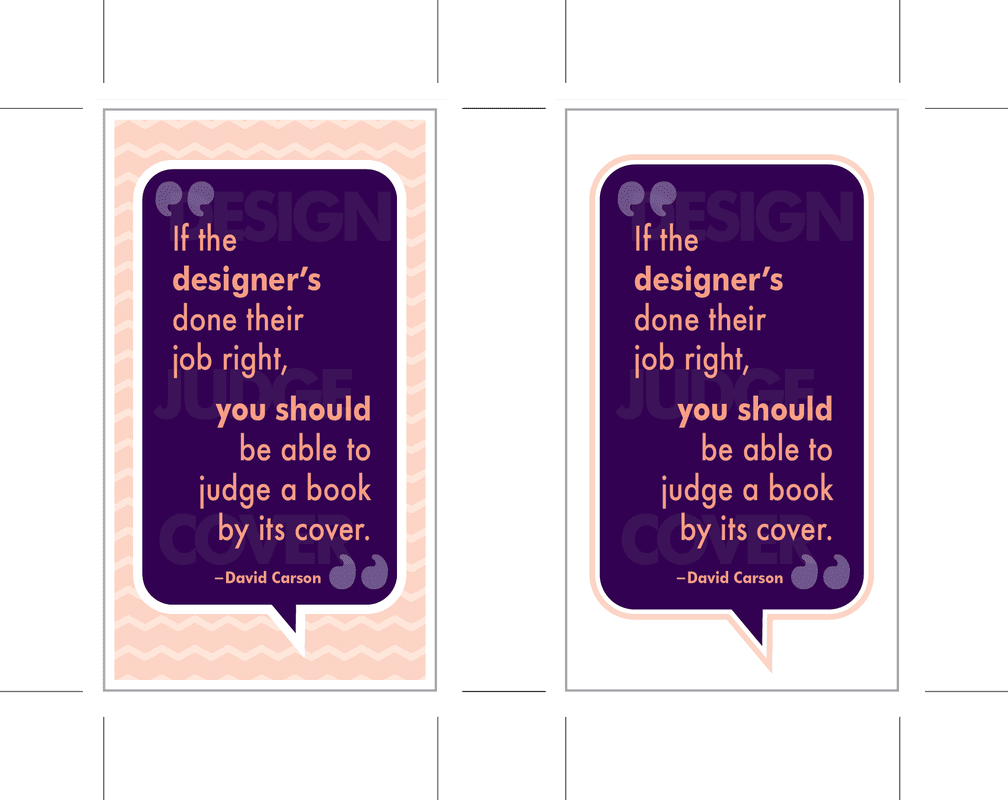
No. You don't HAVE to. You can choose to have a colored image that ends before the edge and allow that white around it. If that is the case, that white becomes part of the composition, so it needs to work. In the examples below, I've shown two possible options. The left is where a white border is included as part of the composition. The right, I've eliminate a background altogether.
Do you HAVE to use a bleed?
No. You don't HAVE to. You can choose to have a colored image that ends before the edge and allow that white around it. If that is the case, that white becomes part of the composition, so it needs to work. In the examples below, I've shown two possible options. The left is where a white border is included as part of the composition. The right, I've eliminate a background altogether.
In some cases, you CAN'T have a bleed. The most common reason for this is if you're printing out a full-page design on a printer or copier that does not allow for printing all the way to the edge of the paper. It's really helpful to know this limitation in advance, so the layout can incorporate the "unprintable edges" into the composition.
How to correctly set up a bleed.
First things first, check with your printer! They will have an amount that they recommend that works well for their setup and machinery. Typically it's a small amount, say 1/8" (0.125"), but can vary. There should also be a "safe zone" away from the cut. All the important stuff should stay within the safe zone and nothing super-duper important should go past it, just to, uh, be safe...
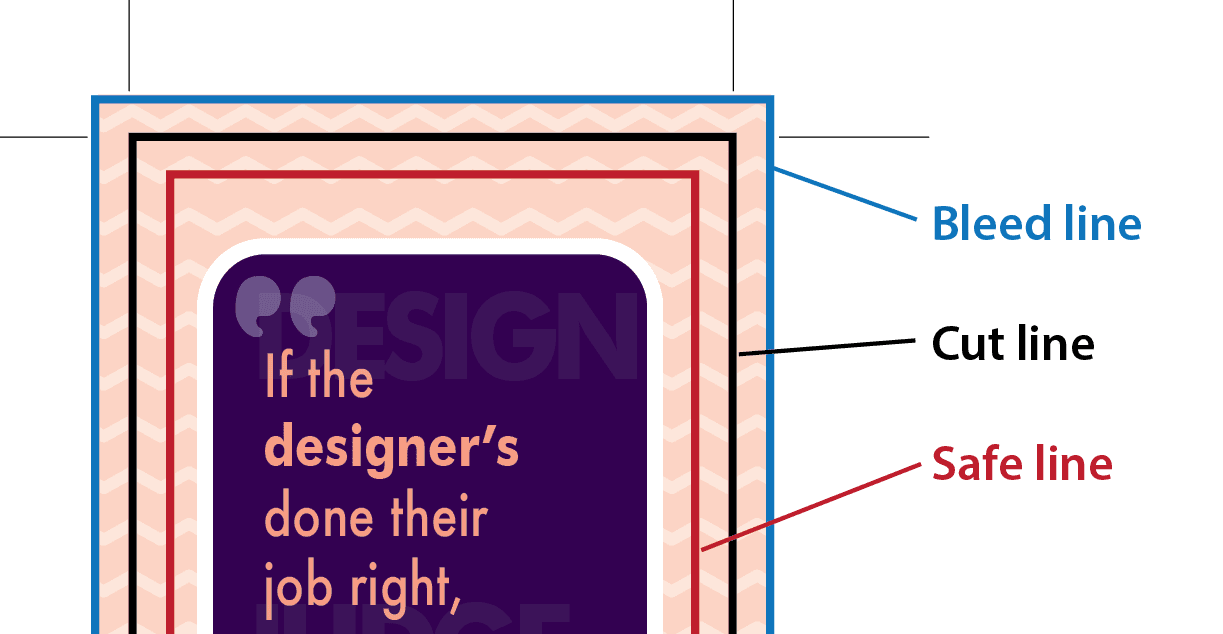
To correctly bleed an image, the edges of the printed piece HAVE to be trimmed. This is a requirement. (Did you get that? It's mandatory.) So if you have an 8.5 x 11" image that has a bleed, it has to be printed on paper even BIGGER than 8.5 x 11" and then trimmed down to size. Will it cost more? Yep. A little. The paper is bigger and then a trim charge is added to the bill. This is important to remember BEFORE the job event starts. If budget is an issue, make sure to talk with your designer and printer about this and find out how much it will cost before the design is approved.
 RSS Feed